Last Updated on April 23, 2022 by SulaBeauty Staff
You’ve undoubtedly questioned what to do to keep nail polish stay longer once you’ve had a new manicure. Believe us when we say that everybody who has polished their nails has had short-lived manicures.
If you’ve tried everything to acquire long-lasting nail polish but still can’t seem to achieve it, you’re constantly wondering what that really costs. Fortunately, there are numerous methods for extending the life of your manicure.
The most you can do are a few modifications to your schedule and the correct tips & techniques. Read along for advice on how to extend the life of your gel polish.

9 Easy Ways To Make Nail Polish Last Longer & Keep Your Mani Salon-Fresh
There is nothing more frustrating than spending all that money on a manicure just to have it damaged and flaking after a few hours. Without a doubt, the polish will not last eternally, but isn’t it a horrible disaster that a flawless manicure is so short-lived?
However, experts claim there are some nail care modifications you can do to help your manicure paint stay longer. It’s time to get down to business and know how to make nail paint stay longer.
To preserve your manicure and pedicure in tip-top shape, heed the directions below.
1. Don’t soak
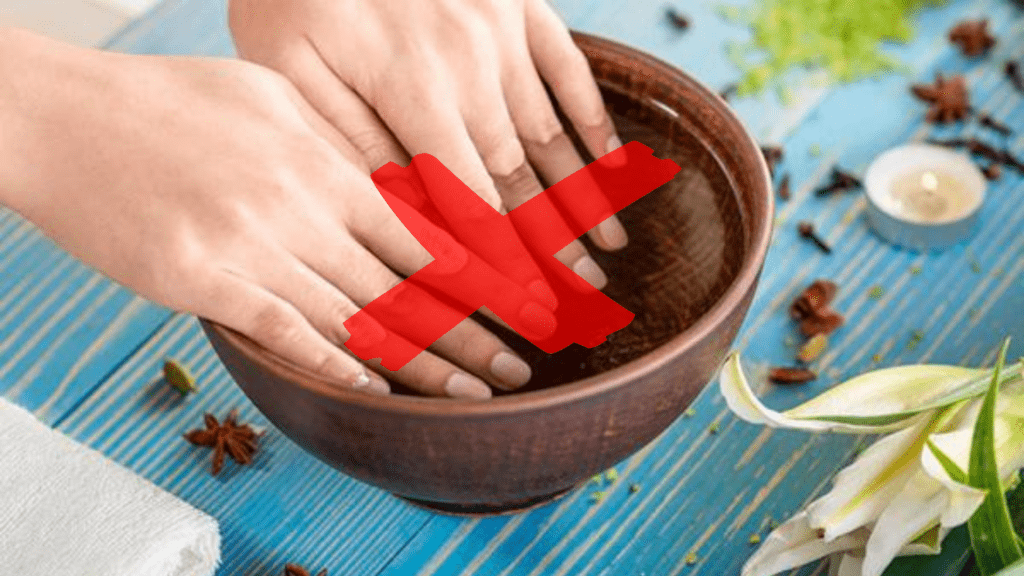
The nails stretch when you immerse them in water for a longer period of time.
When you put manicured nails in the water to soak, the fingernail distorts and widens the form, which leads the completely cured nail polishes to crumble early.
Although soaking can help dissolve the tougher skin on the heels of the feet, it isn’t essentially relevant for the much more sensitive skins on your hands. It’s also a good idea to prevent soaking your hands only after a manicure.
Not only may moisture induce your fingernails to stretch and shrink, causing the nail polish to peel, but it could also trigger them to become fragile and thin over time. To preserve your manicure, get ahead of the trend and wear gloves when doing home duties.
2. Buff the nails after filing
Don’t forget to smooth your nails after you’ve clipped and shaped them.
You can end up creating small micro-frays along with the nail with a harsh emery board, which may not have you been able to see all the divides, but truly that if those imperfections begin to husk, your nail polish will scrape along with them.
Buffing along the outer end of the fingernail, on the other hand, really assists to heal the epidermal layers which may have separated during polishing.
You can also use a crystal manicure file to reshape and polish the corners at the same time. A glass or crystal file also covers and binds the keratin sections of the outer end of the fingernail owing to its tiny granularity.
However, if you use a conventional emery board, you’ll almost certainly require a fast buffing.
3. Avoid getting the polish on your cuticles
Even though you’re a professional at manicures, it is quite possible for you to put nail polish on your cuticles or skin around the nails by accident. However, since the nail polish doesn’t at all cling to the skin as well as it does with the nails, this might result in flaking or crumbling. As all that polish rises and rips, it may also raise and tear the nail polish from your fingernails.
It is easy to say, to give it your best shot to stay within the boundaries. However, perfecting a flawless manicure is a challenging task.
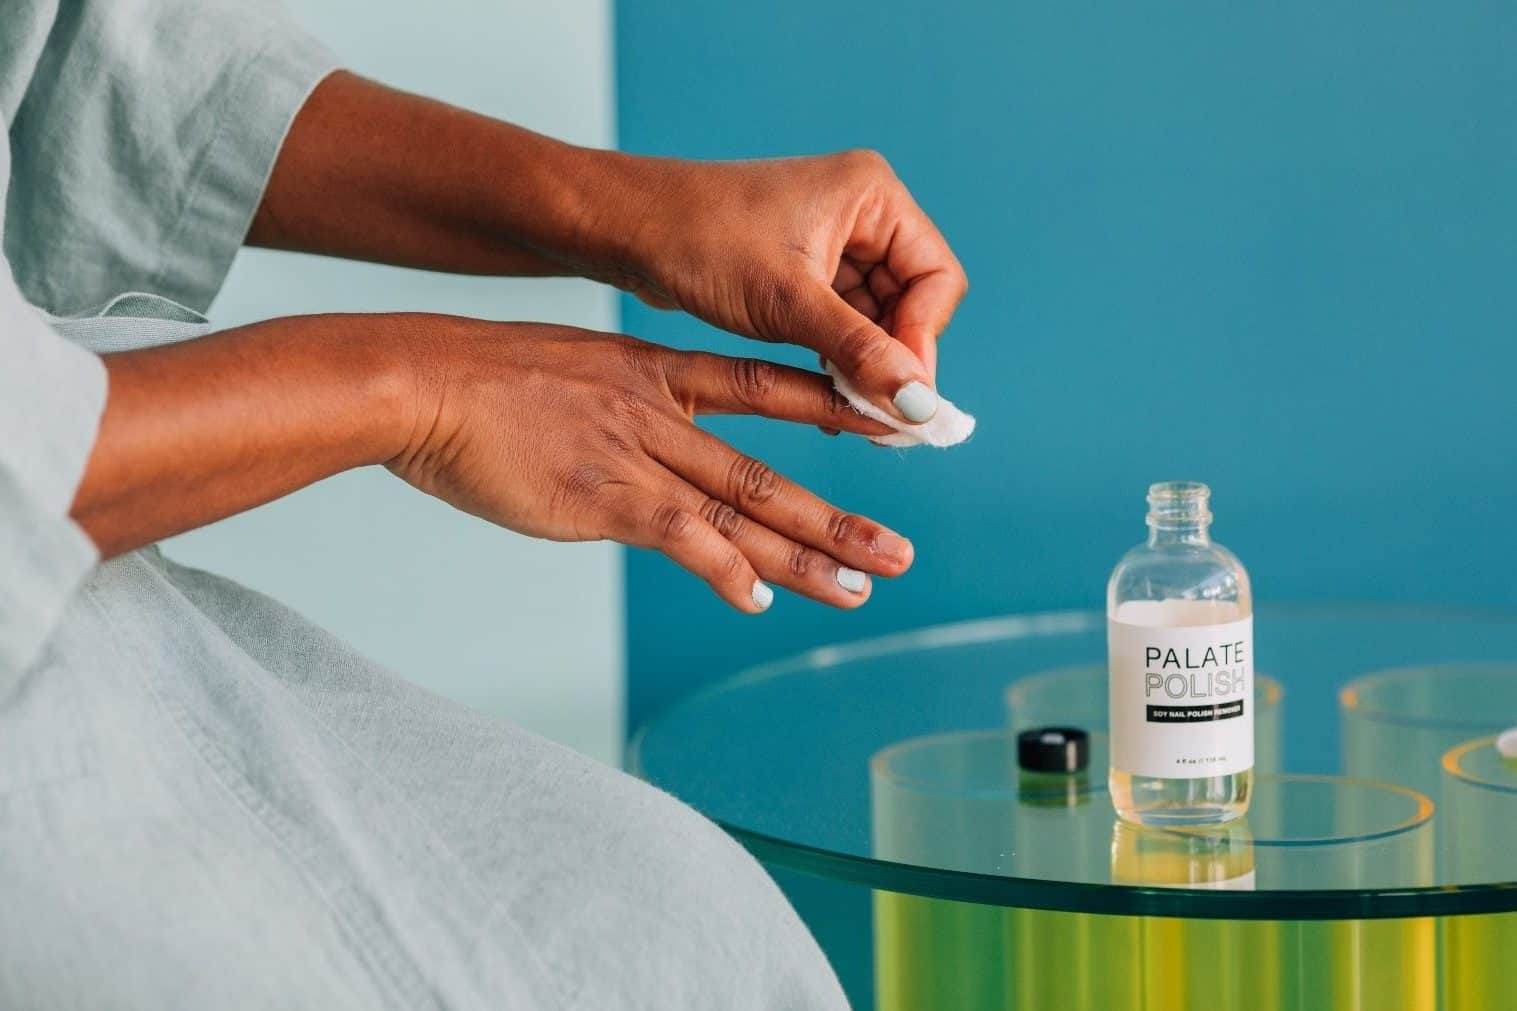
Before putting on your base coat, apply cuticle oil to outline the border of your fingernails, paying specific attention to your cuticles. Because the gel formula works as a buffer between your skin and your nail beds, if you smear just a little polish onto your cuticles while painting, it will easily clean off.
Nevertheless, you can wipe it up fairly quickly. Just soak a cotton bud with nail polish remover and gently wipe away any polish that is not supposed to be there.
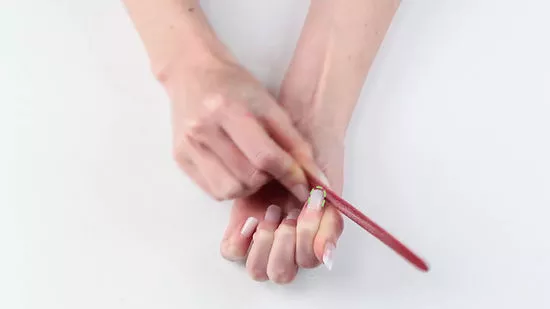
4. Push your cuticles back
It’s simple for the polish to hold onto your cuticles and flake off, ruining your manicure. Using a thin stick or a cuticle pusher to carefully force them back can potentially generate more room on the nail plate.
After you’ve cleaned up your cuticles, make sure you remove any excess oils from the nail gel. To cleanse the nail plate, rinse your hands with a gentle soap or just use a polish remover.
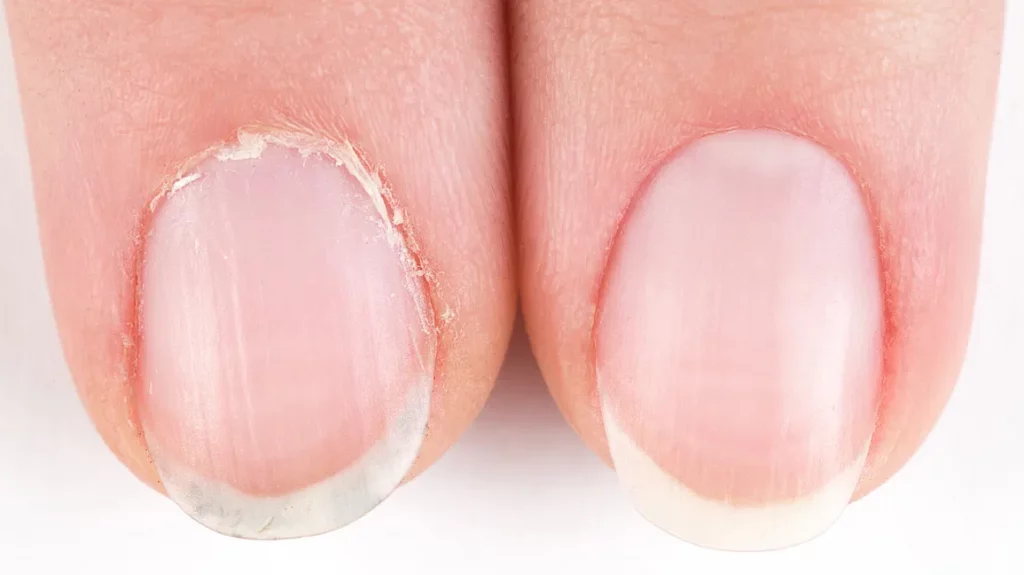
5. Use nourishing, conditioning polishes
The polish will crack more easily if your nails are fragile and delicate. And besides, how could a manicure last on fingernails that are prone to breaking and splitting?
Colors, topcoats, and base coats with restorative and hydrating elements, on the other hand, have a lot more lasting appeal. The base coat is by far the most significant since it is what comes into contact with your nail and seeps into the tissue.
So, if you’re only wanting to purchase one high-quality polish, make it your base. However, if you are able, it is recommended that you make the complete switch to healthy nails treatment.
If you haven’t been using cuticle balm and oils on your fingertips on a regular basis, now is the moment to start. Apply a dab of cuticle balm to the bottom of your fingernails after your treatment to give your fingernails some care.
Furthermore, if you rinse your hands frequently during the day, washing away natural oils from your fingers, your nails may crack more quickly. After that, apply hand cream. To put your hands and nails in heads-up shape, incorporate this procedure into your daily skincare regimen.
6. Use a chip-resisting top coat
Finishing coats do a lot more than that to give your paint a shiny leather appearance. If you get an excellent chip-resistant nail polish, your nail polish won’t crumble over time, making nail polish last longer.
Even then, after several days, you might also want to reapply the topcoat—the nail polish can begin to peel off after a while, leaving the color prone to cracks and dents.
This is a useful tip for maintaining your fingernails in good shape between treatments.
If you find that traditional nail polish constantly causes nail chipping, it might be a chance to test a different formula. Obviously, you would like to make absolutely sure that the at-home manicure is done correctly there too.
At-home nails done are also a breeze with no-chip formulations!
7. Let your polish fully set
Although it requires about seven to ten minutes for nail polish to set, you wouldn’t want to be thrashing your fingers straight after putting away the manicure tools.
You might assume your nails are completely dry, but digging inside your bag or putting on your sandals will reveal smeared fingers. Allow your polish to thoroughly cure to avoid tarnishing during the waiting period.
Applying polish in thin coats makes the timeframe smaller than how it would have been otherwise. The rate with which nail polish cures is largely determined by how it is applied. Simply stated, deeper layers require longer to dry and make polish peeling easier. Thin coats make the nail polish last longer.
8. Dry with cool air
Rather than blasting excess heat to cure your manicure, such as the hottest setting on the blow-dryer, choose a cold method.
Upon this topic, you can use a drier, whether it’s a blower or a hairdryer, to help accelerate the drying process. If you go with the latter, ensure the temperature is set to low.
It may feel good, but it isn’t good for your polish’s longevity. Higher temperatures can cause the nails polish to create air bubbles, making it more likely to crack in the future.
Cooler air is more effective than warm air, and it does not dry out the hands or feet. Warmth can run dry your cuticles, which you spend so much time hydrating throughout your manicure.
9. Don’t pick or bite
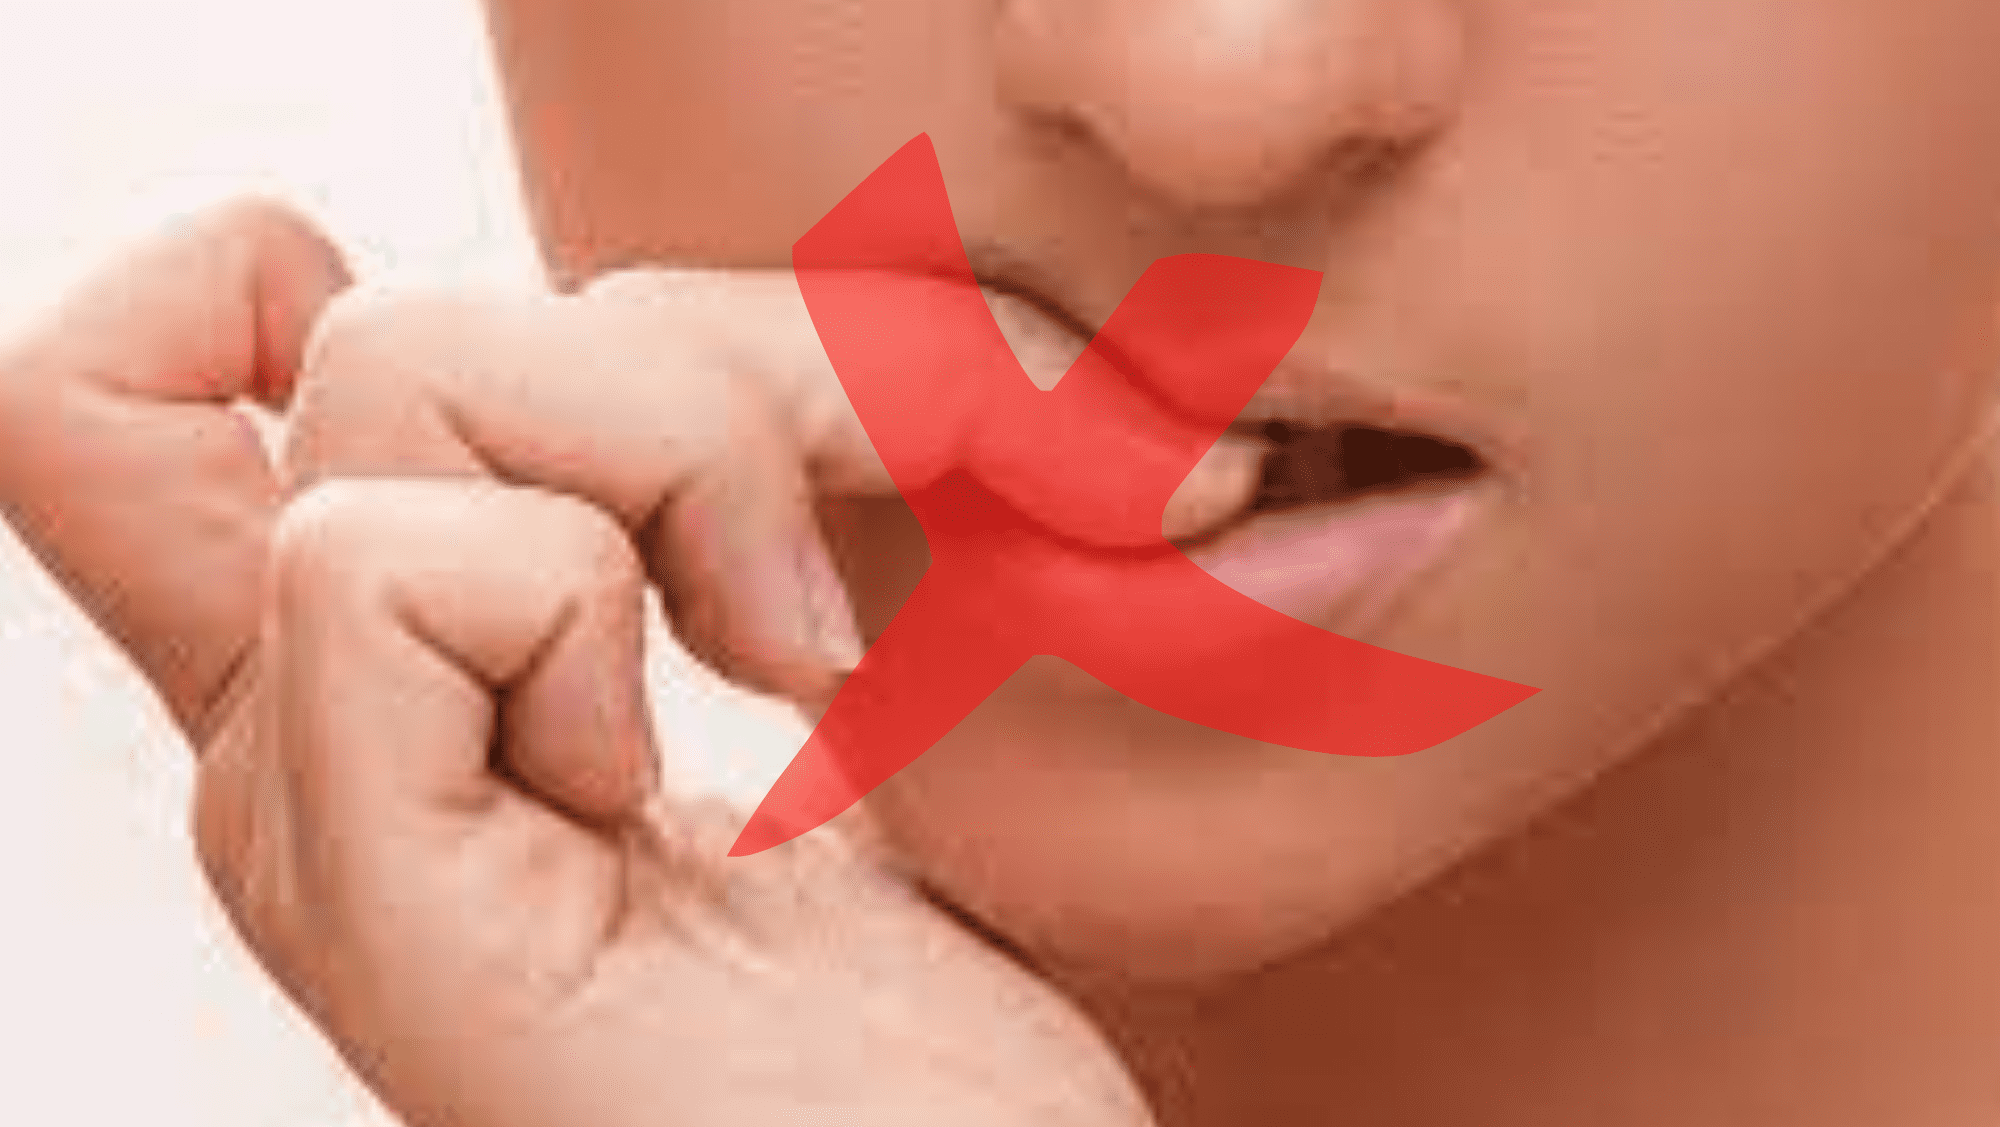
It may sound self-evident, but the longer you nibble on your nail polish, the worst is the probability for it to stick longer.
If you’re a chronic nail-biter or cuticle digger, it can be difficult to break the knack. Use the suggestions above to put an end to your nail-biting forever.
Many people find that mindfulness training, such as breathing exercises or taking a short walk, is beneficial, whereas others have to seek other methods to keep their hands occupied.
How does Vinegar make Nail Polish Last Longer?
The acidity in the vinegar will assist the nail polish to stay on your fingernails better. Vinegar can strengthen the base of your nail and help the manicure last longer.
Gently immerse your fingernails in half a glass of mild water and three tablespoons of vinegar, preferably apple cider vinegar or white vinegar, for one just a minute. Let your nails completely dry. Now, normally paint your nails.
This will get rid of the excess oils that are often covering the nails. The nail polish will attach to the nail’s base rather than the oils. This will make the nail polish last longer due to better bonding of nail polish over the nails.
How to Make Nail Polish Last Longer in the Bottle
The agents inside the nail polish are activated by extreme temps, resulting in a viscous, molten feel. Maintaining a cold environment will extend the polish’s shelf life and make your nail polish smoother to use. You can store it in the fridge, and only take it out when you want to use it. This will give the nail paint a better environment and shelf life.
Final Thoughts
If you can’t appear to be going 3 days before chipping your manicure, these methods will ensure that your manicure lasts. However, despite how flawless it is, you should not put the same color on for more than 3 weeks. The color in the base coat may start to discolor your fingernails if it wears out.
Consider it as a warning that your nails need a break if your lacquer begins to chip after a while.