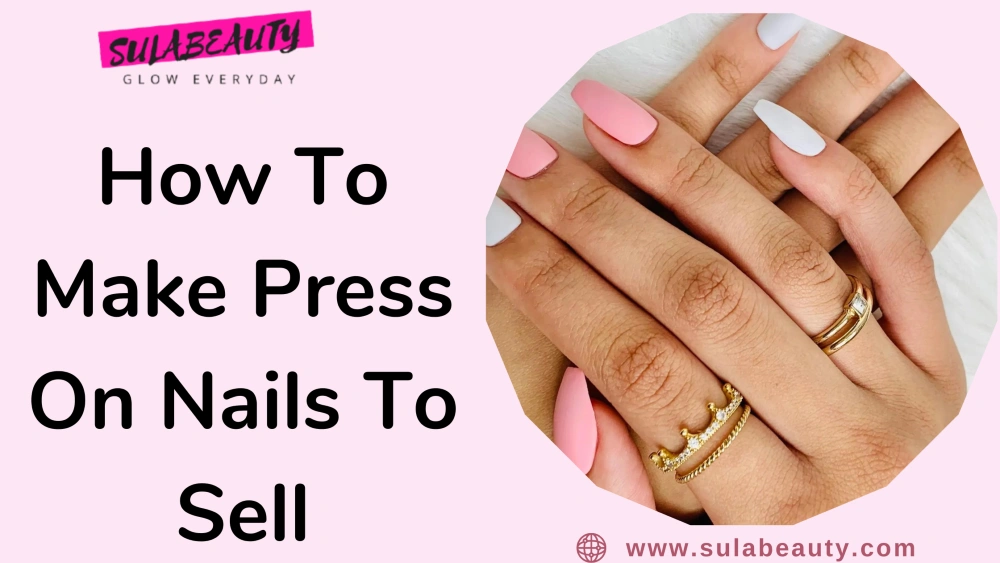
Press-on nails have been trending in the cosmetic industry on a global level. You will find so many budding brands selling falsies in the market.
But if you love to create and are into manicures and Press-ons, this could be an excellent opportunity to earn while doing what you love. And the fun part is, that you may even start selling from the convenience of your home.
Certain websites, such as Etsy, even promote handcrafted products. Also, if your artwork is original and you’re good with creative work, you can start independently. In fact, custom press-ons are in high demand as compared to your salon manicures.
Not sure how to make custom press-ons at home? Through this article, you will learn all the required measures starting from setting up of workspace at home to creating sets of perfect nails.
By the end of this article, you will have an idea to get started with your passion.
So, let’s dive right in.
Things you’ll need To Make Press On Nails from Scratch
Whenever you plan to start a business, you must first invest in the procurement of raw materials and create a workspace to perform the job efficiently.
Likewise, before you get started with creating beautiful press-on sets, here is a list of things you must stock and ensure their availability as pre-requisites:
1. Clean work area
Primarily, it would help if you decided upon the workspace area where you will be doing all the tasks, from the desk job to the creative work. You may set up this workspace in the corner of your house or in a separate room that would be dedicated entirely to business-related tasks.
Once the area has been fixed, ensure to clean the space. Set up a table placing all the raw materials, leaving enough room for carrying out the creative tasks.
2. Grab a pair of gloves
Buy a pair of gloves. As the job would require working along with multiple chemicals, gloves would ensure the safety of your hands and skin around cuticles.
Using a pair of Nitrile gloves would be safe as they save you from all the chemicals you’d be using. Also, these are puncture free and would prevent any latex allergy.
3. Find your Press-on supplies
Next, you must procure all the materials required for creating the Press-on nail sets. You would require sets of false tips, brushes, gel polish or even regular paint, base coat, top coat, jewels, acetone, nail files, napkins, and glue.
The falsies are available in different lengths and shapes. Extra long coffin nail tips are pretty much in trend. So, you may also want to take the current market demands into consideration right from the procurement of materials.
4. Prep your Nail Stands
While creating patterns on Press-ons, you’d need them to be placed at a certain height and fixed. It will help you quickly design them and prevent the hassles of tips coming off now and then.
To aid with this, you may procure nail stands. These are available in different sizes. You may buy any size you’re comfortable with. The only thing to ensure is that the stand has enough space to stick on at least 10 nails at a time.
The nail tips can be temporarily fixed to this stand using considerable-sized double-sided tapes or mounting putty.
5. Curing Units
Another vital piece of equipment you’d need is a curing unit. You may use a handheld curing unit, as it is more convenient. Also, you can constantly adjust the distance or height, as it is done manually.
Another option is to go for a curing lamp. Here, you would need to adjust the height of the nails so that they reach the surface for proper curing.
Check out this gorgeous curing lamp here. It has multiple timer settings and an automatic sensor.
6. Nail Tips
And finally, buy nail tips of varying shapes and sizes. It is good, to begin with, a collection of sets that offers every possible option, as every client may have different needs to be catered to.
Brands such as Gelip, Kokoist, and Apres are famous for their wide variety of nail selections. And they are also well known for their fine quality tips. So, you might want to give them a try.
How to Make Custom Press on Nails at Home to Sell
Now, let’s go through the step-by-step procedure to customize and create beautiful Press-on nails at home:
Sizing Press On Nails
Before you start designing and customizing falsies, you must first create sets of press-on nails based on their sizes. The purpose of sizing is to provide a suitable fit for the customer.
You may create sets considering the sizes falling under a small, medium, or large-sized category. This way, you can segregate the nails into these three sizes. You may add a few extra pieces, just in case any specific nail does not fit well.
If you find it time-consuming to create size-based sets, you may create a set with 2 pieces of nails for each size. It would ensure that the user can access all sizes and may wear the most suitable sizes. This technique saves a lot of time and effort.
And thirdly, your customers measure their natural nail size using inch tape and provide their accurate measurements (in cm unit). Now, based on this data, you could prepare a custom set.
As per this sizing method, you wouldn’t need to add any extra nail pieces, saving your material. However, it may be a bit time-consuming.
Prepping the nail tips of Press On Nails
Once the sets are ready, you must begin prepping up the nails. The significance is to smoothen the edges, remove the shiny surface to make them look more like natural nails, and paint them easily.
Use a nail file to shape the nails and smoothen the uneven edges. To buff and for removing the shiny layer from the nails, use a nail buffer sponge, or even an acetone-based remover should work.
Wipe each nail with alcohol
Once done with filing and buffing, wipe each nail with an alcohol prep pad or an alcohol wipe. This helps in removing all the dust particles from the nail surface. And it completes the prep process. Now, the press-ons are ready to be adorned.
Prepare your nail stands
Now that the tips are all set, you must temporarily set up a stand to fix all the nails. You may either use a little piece of adhesive tabs or putty to fix the falsies to the stand. It generally comes along with the nail stand.
The nail stand would allow you a steady grip over the nails; thus, you can easily style them. Once they’ve adequately dried, you may get them off the stand and get going.
Applying gel base coat
Once the nails are fixed onto the nail stand, you may begin by applying a base coat to the nails. The base coat provides a smooth yet protective layer for your nails to be designed. It helps them harden to avoid breaking or splitting as well.
Also, this additional layer protects the nails from getting affected by the chemicals. Therefore, making them more durable, the user can even reuse them in the future.
Styling Press On Nails
Once the base coat has dried, you may start styling and designing the nails as you like. You may use gel nail polishes, add glitter, or even apply jewels for some fancy looks.
You may even go creative and make some art designs using nail art brushes. Once all the nails are done, allow them considerable time to dry.
Applying the top coat
Once your designer nails are ready and dried, apply a thin layer of top coat on each nail. It gives a finishing touch to the nails and protects the nail designs.
Also, the client may reuse these nails if worn and removed carefully. And the top coat helps in maintaining their durability.
Shipping Press-ons
Now that your falsies are ready to be mailed out, you must ensure safe packaging to protect them from getting damaged while in transit.
Learn How to Package Press on Nails
You may purchase sheer plastic cases to store the press on nails. It also allows the product’s visibility and keeps the nail set safe. Add the nail case, along with a mini nail file, cuticle pusher, gel polish, nail buffer, and nail glue, in a fancy pouch to complete the kit.
For a personalized touch, you may add a message acknowledging the customer. Also, add your business card along with the product details receipt.
Now that your kit is ready, pack this pouch in a plain cover with the sender’s and recipient’s address information.
To initiate the shipping process, either drop this parcel to a nearby Post Office or register with a private postal service provider. And the client must receive the order with 1-2 weeks’ timeline.
Conclusion
This blog post is for all the creative heads who wish to start a press on nail business venture. Press-on nails have been highly in demand, and if you love creating new patterns and designs, this could be your thing.
All the basic details starting from the purchase of articles till mailing out the parcels have been shared through the article. So, without further procrastination, take this small step towards your passion. Good luck and have fun creating artistic nail designs!