Last Updated on September 21, 2022 by SulaBeauty Staff
Press-on nails are available in diverse shapes, sizes, lengths, and patterns. But what if you’re only left with your square-edged Press-on nails and want to wear almond-shaped nails? Are you aware that you can always file your Press-on nails as per your desired shape and fit?
Yes, that’d be true. Just like your natural nails, false nails can be filed as per the shape of your liking and fit your nail plates better.
Not sure how to go about it? Don’t worry. Through this blog post, we’ll guide you with a step-by-step guide on how to shape your Press-on nails before applying them.
So, without further ado, let’s dive right into the details.
Press on Nails Too Big? What to Do?
If the set of Press-on nails you have is relatively huge for your natural nail size, it can be tailored to fit the size of your tips and give a natural accent. Once you have applied the Press-on nails, allow them to cure and dry. If you do all these things, it will Make Press-On Nails Look Natural
Later, trim down their lengths based on your requirement and smoothen the edges using a nail file. And you’re ready to rock the show with your well-fitted false nails.
Can You Shape Press on Nails?
Yes, of course. Firstly, you need to look for the size of the Press-on nails closest to the size of your natural nails. Once selected, file it from the bottom to match your cuticle’s shape and arc size.
After all the nail pieces are filed, place these over your natural nails to confirm the sizes fit you well. For confirmation, check if you need to push down the press-on to get placed evenly on your natural nails or not.
If you still require to push it down, then the Press-on nail must be filed based on the shape of your nail.
Note: While filing the nails, drag the file slowly on the edge areas of your nail in one direction. Filing by dragging the nail file in back and forth direction only seems compelling, but you may end up filing them too much, spoiling the shape of the nail.
How to Shape Press on Nails
As mentioned above, let’s go through the detailed step-by-step procedure to shape your Press-on nails effectively.
- Gather Your Supplies – Press on Nails, Nail File, Scissors
Gathering all the necessary tools required in the filing process is crucial. To name a few, keep a pair of scissors, a set of Press-on nails, and a nail file.
- Choose the Shape of Your Nails
Before starting the filing process, research well and check what possible shapes a press-on nail could be filed. Choose one shape you want to give your Press-on nails based on your liking.
It is recommended by professional nail artists to always go by a shape that resembles your natural nail shape if you wish to get a natural look.
- Trim Nails to Desired Length and Shape Using Nail File
If the nail length is longer than required, trim the entire set to a fixed length. Once all the nails are trimmed, keep a nail file handy, and the edges need to be smoothened.
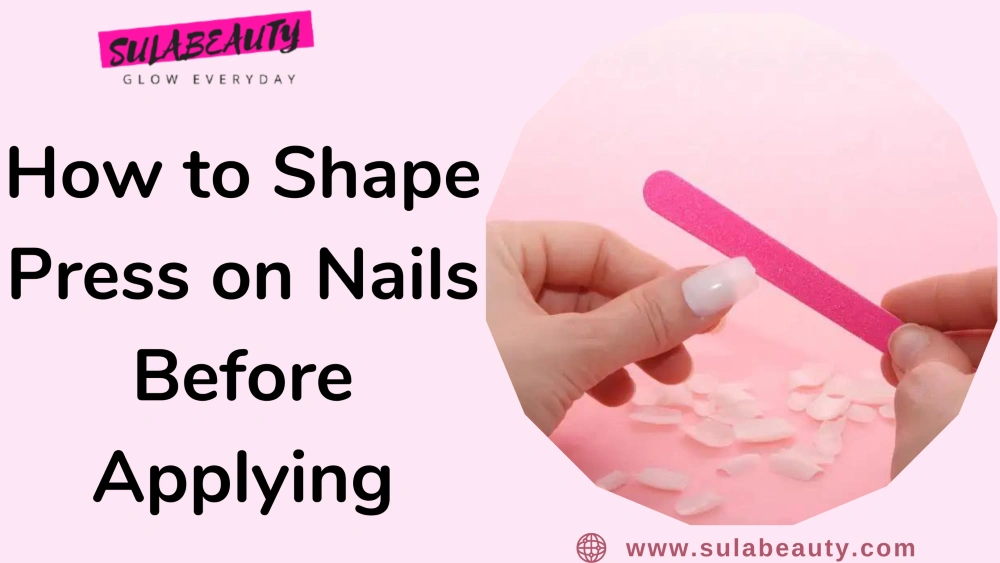
- File Nails Into Desired Shape Using a Nail File.
You need a nail file to shape the Press on nails, as in Step 2. Start filing the nail pieces, one at a time, with the help of the tool. Make sure that the strokes are made in one direction only.
It will help you file them safely and give a similar shape to all the nails instead of ending up with varying lengths and inconsistent shapes.
- Apply Adhesive to Back of Nails and Wait for It to Dry
Once all the nails are filed, recheck their shapes and lengths by placing them over their designated nail plates. If the entire set looks fine, apply nail glue on the backside of the false nails, one at a time. Learn How to apply press on nails with adhesive tabs.
- Position the Press on Nails Over Your Natural Nails and Hold for 10 Seconds Until They Stick
After the glue has been applied and spread evenly, place the bottom of the Press-on nail towards the cuticle. And then gradually place it towards the tip.
Now, press it gently over your natural nail for at least 10-20 seconds. It will allow your Press-on to be glued firmly to your nail plate.
Once done, repeat the same for all the fingernails.
- Optional – Apply Top Coat for Extra Shine and Protection
After all the Press-ons are applied successfully, allow a considerable amount of time for the adhesive to dry. And now it is time to give a finishing touch to the false nails.
This step is optional. However, it would help enhance their life for you plan to re-use them in future.
Apply a thin layer of top coat over each nail to get an extra shine on your nails. This top coat would also protect the beautiful patterns on your nails from getting spoiled.
And if the nails are removed gently, these can be used again if you like.
What to Do if Press on Nails Are Too Small?
You may apply and wear Press-on nails that are slightly smaller than your natural nails. However, in the meantime, they will remain prone to lifting and popping out. Press-ons that are already smaller can not be adjusted to fit your nail plates. Hence, it would be risky.
Therefore, professionals recommend you to either find a perfect fit or one size up when looking for false nails. If you choose the latter, it can be trimmed and filed to fit well, unlike the small-sized nails.
Conclusion
Press-on nails are available in various shapes and sizes. However, the size of your natural nails may differ from the manufactured false nails. Hence, you have the flexibility and leverage to trim and file them down to suit your nail size.
To ensure you do it efficiently, follow the detailed procedure shared in the blog post. It may take at least 45-60 minutes in the initial stage, but with practice, you’ll get quicker and more comfortable with the entire process. Try and see if this works for you.